I understand the requirements for the Decisive Moment photo challenge.
I can take three pictures of the same subject from different angles.
I can load these images into Lightroom.
I know how to perform basic edits and organize photos in Lightroom.
Steps:

1. Today's Activity: Three Photos, One Edit.
2. We will watch a couple of videos on how to organize and edit photos in Adobe Lightroom.
3. Strong goes over the first Photo Challenge, The Decisive Moment. - SHOOT THESE THIS WEEKEND WITH YOUR PHONE.

Next Step:
Edit photos for the Decisive Moment Photo Challenge.
For today’s activity we will be setting up our computer to work with Adobe Photoshop and Adobe Lightroom. By the end of the period you will have a set up where you will be able to edit each photo you take.
REMEMBER: You will need to repeat this step EACH TIME YOU MOVE SEATS.
Step 2: Go to the F: Drive of your computer. Right click on the white space and create a folder called “Catalog.” This is where we will be creating our catalog to use in Adobe Lightroom.
Step 3: Open up Adobe Lightroom on your computer by going to the windows sign and choosing Adobe Lightroom from the list or type in “Light” into Cortana at the bottom left of your screen.
You will get an error message that says it cannot create a catalog. Click “Create new Catalog.”
Browse to the Catalog folder under your name on the F: Drive. Type the name “Catalog” into the Name field and click create.
This will create our catalog file.
DO NOT MOVE YOUR CATALOG FILE OR ALL OF YOUR PHOTOS WILL APPEAR TO BE DELETED.
Lightroom will now open.
Step 5: Strong goes over importing and editing photos. Import one of your favorite photos from the alphabet project.
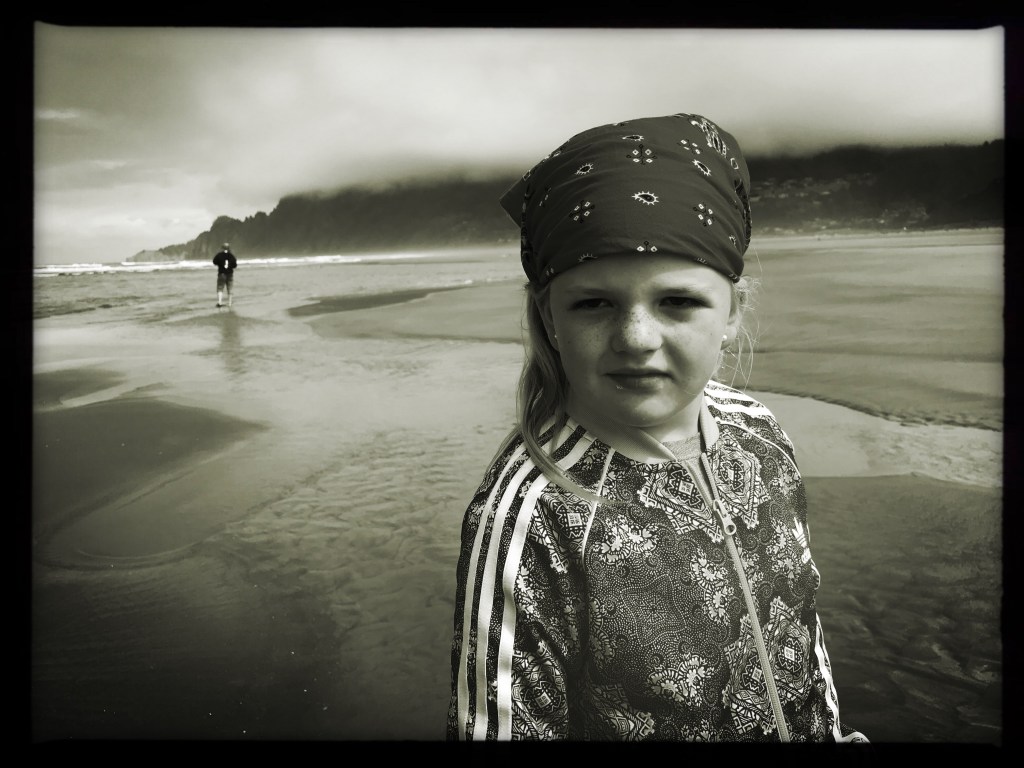
Both of these images were shot this summer on my cellphone, using an app called Hipstamatic. Both were shots I didn’t plan out. I knew that they would make good subjects for pictures. And I definitely had to wait for the right moment, but it wasn’t that easy. I took several shots of each subject. I chose the one that had the strongest emotional impact on me. For both images I used the rule of thirds composition technique and both images have relationships between the foreground and the background.
The small moments captured in the photos above represent just one snapshot of time frozen with a picture. That’s what a picture can do, perfectly capture a moment. There is theater alround us at all time. It only takes an observant person to notice these moments.
If you don’t have access to younger siblings or cousins, or what not. Try the clouds, try a pet. Try the way the light hits the side of a house, or an open window on a summer afternoon. There are decisive moments both small and large happening all the time. All it takes is an observant person to capture them.
Step 1:
Shoot around 10 photos of various subjects.
Step 2:
Bring in the photos to class.
Step 3: Load the images into Lightroom.
Step 4: Edit the photos to enhance the decisive moment factor of your photos.
Step 5: Rate the photos from one to five stars.
Step 6: Upload the top three images to your visual journal.
Turn in these three into Google Classroom as .jpegs.
I understand what Bresson meant by the Decisive Moment
I have my Alphabet Project Turned in.
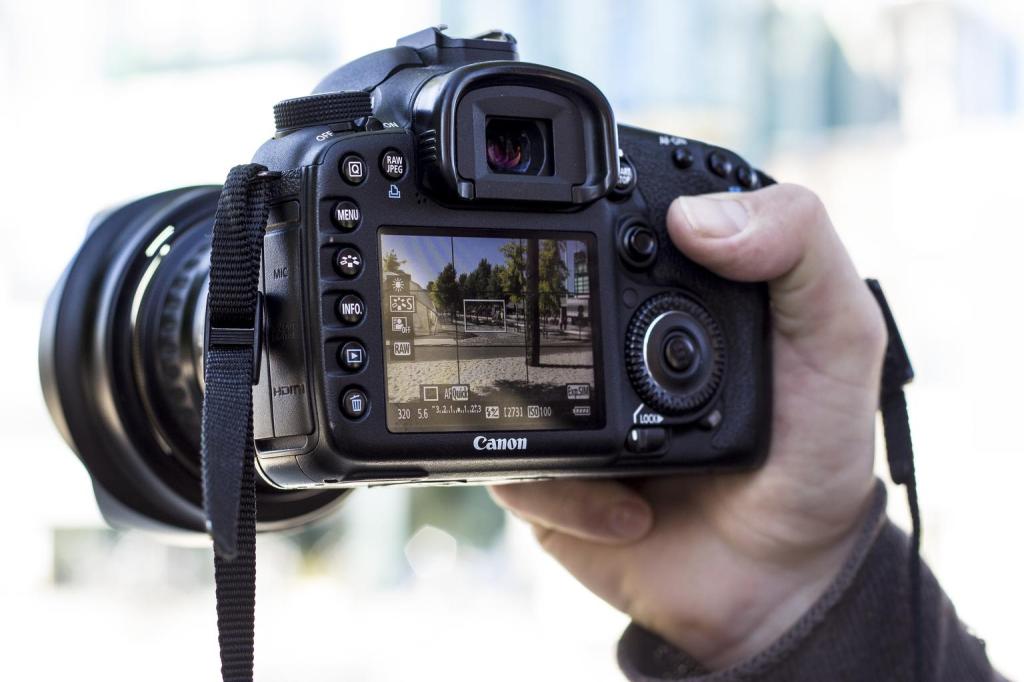
I can, with my group, learn the basic parts of our Canon DSLR cameras.
Steps:

1. Read the post on the Decisive Moment.
2. Write a post on your visual journal about this concept.
   - The website you made last week.
3. With your table mates, work on the DSLR Scavenger Hunt
   - Read the manual as a group and answer the questions.
   - Turn in answers to Google Classroom.
   - Each person turns in their group's answers.
4. We will compete in a Kahoot Gameshow on this.

Next Step:
Google Quiz on these concepts.
I know Bresson means by the “Decisive Moment” and why its important in photography.
I can reflect on the Decisive Moment and Bresson’s photo in my visual journal.
I understand the different parts of the camera my group was assigned to.
Steps:

1. Read the post on the Decisive Moment.
2. Write a post on your visual journal about this concept.
   - The website you made last week.
3. With your table mates, work on the DSLR Scavenger Hunt
   - Read the manual as a group and answer the questions.
   - Turn in answers to Google Classroom.
   - Each person turns in their group's answers.

Next Step:
Kahoot & Google Quiz on these concepts.
Be prepared to answer the following questions. You will answer them as a group.
What model of camera do you have?
How do you turn the camera on?
How do you take a picture?
Where does the Tripod plug in?
Where is the focus ring on your camera?
What does MF and AF stand for?
What does the AV, TV, and M settings on the camera mean?
What button can you press on the camera to see the settings?
How can you shoot video?
Where does the memory card go?
How can you set the self timer?
What two controls can you use to get focus?
How is getting focus different in these two modes?
How do you wipe a card?
How do you name the files?
What is aperture and how do you change it on this camera?
What is shutter speed and how do you change it on this camera?
What is white balance and how do you change it on this camera?
What is ISO and how do you change it on this camera?
Find the answers to these questions before the end of the period. Record your answers and share them with your team members on your Visual Journals. Each person will post the answers to these questions on their visual journals.
Next Step:
We will have a Kahoot quiz game on this and we will take a Google Quiz.