For this week’s photo challenge, you will take one INDOOR PORTRAIT and one OUTDOOR PORTRAIT. of the same person One taken inside in one of our studio spaces, and one taken outdoors, either outside of school or on school grounds.
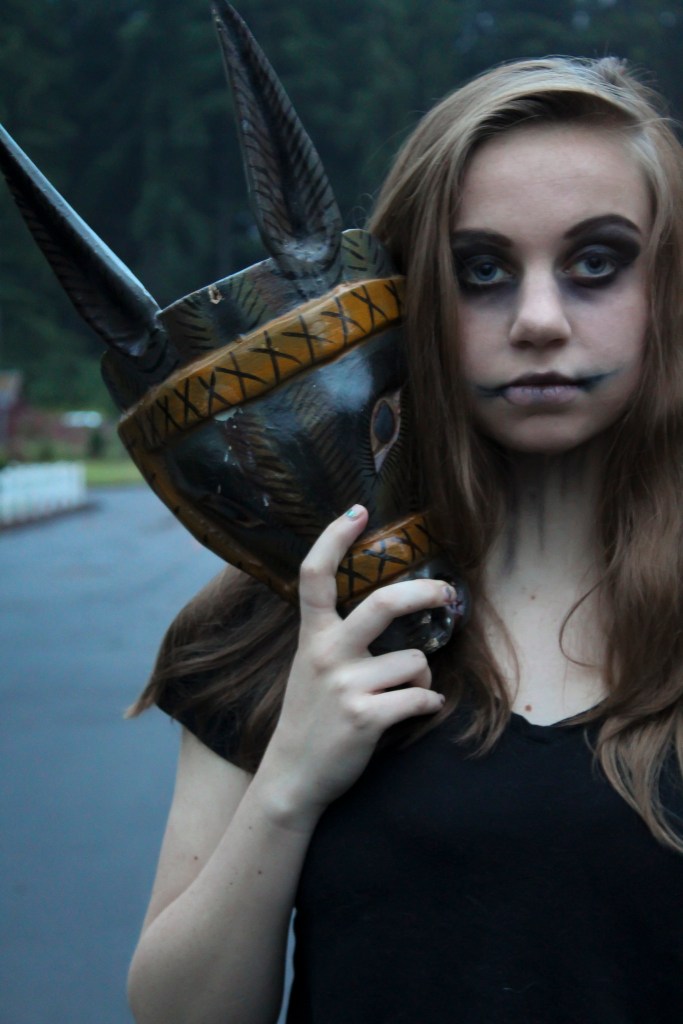
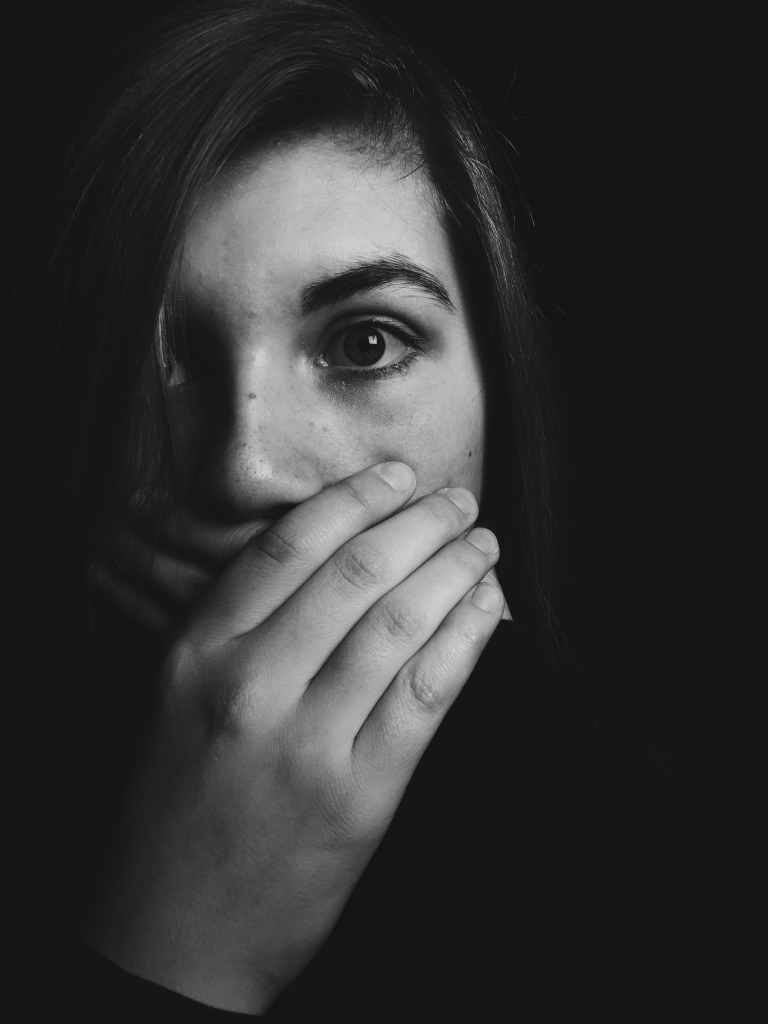
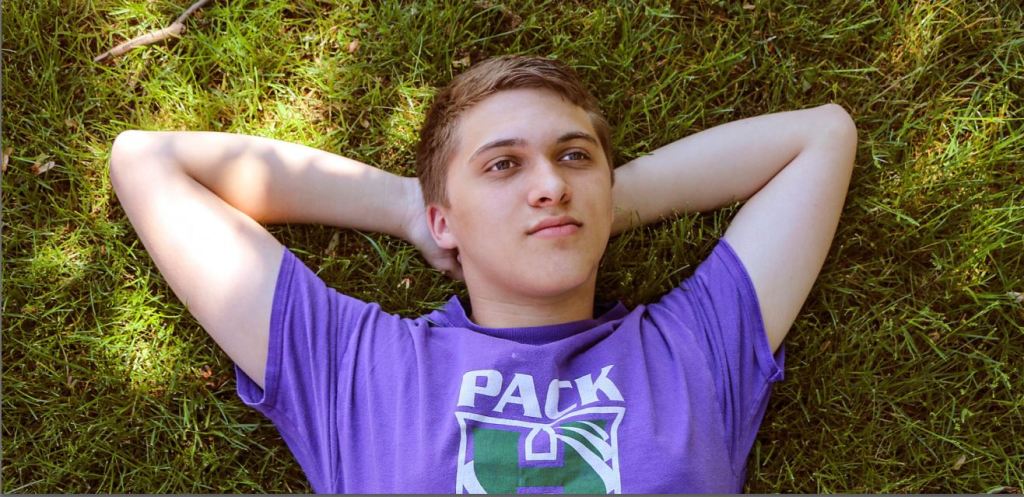
The purpose of any portrait isn’t just taking a flattering image of someone, but trying to get across the the viewer the essence of that person. Notice all of these examples show people being truly themselves. We can tell what their interests are based on where they are placed. Lying down on a patch of grass and looking up at the sky, arms placed just so. We get the essence of a person there. Standing in the batting cages, the light hitting her harshly, but she takes that light head on, with no apologies, there is personality there as well.
WE WANT TO GET PASSED THE SELFIE LOOK AND TRULY GET TO KNOW ANOTHER PERSON.
Find out two bits of information about this person, and capture two sides of their personality in two different photos.
One example could bet, Softball, see above. Or shyness, see above with the hand over the mouth. Maybe the person feels withdrawn, maybe they are a cocky confident personality, maybe they are goofy, funny. Put this in the shot!
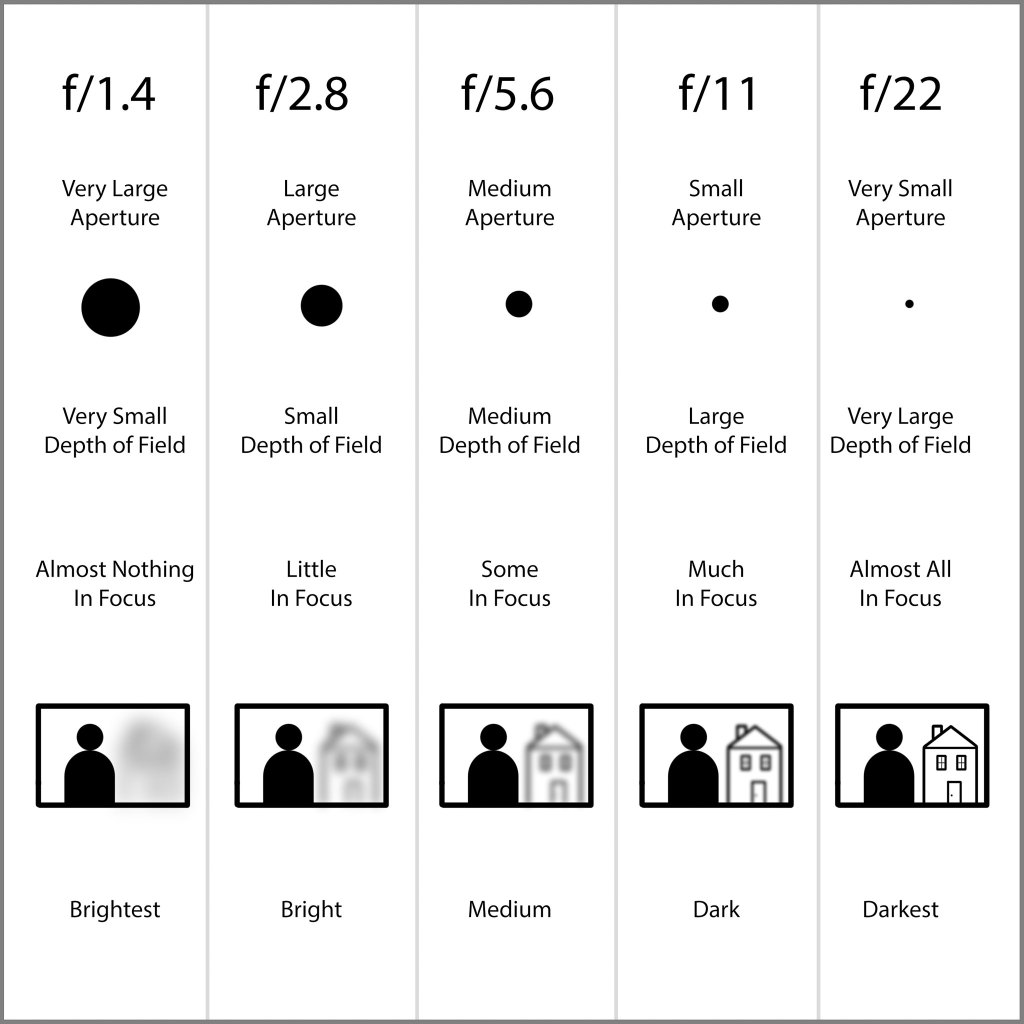
To do these photos, we will be using the AV mode of the camera. This time we will be using APERTURE to control DEPTH OF FIELD
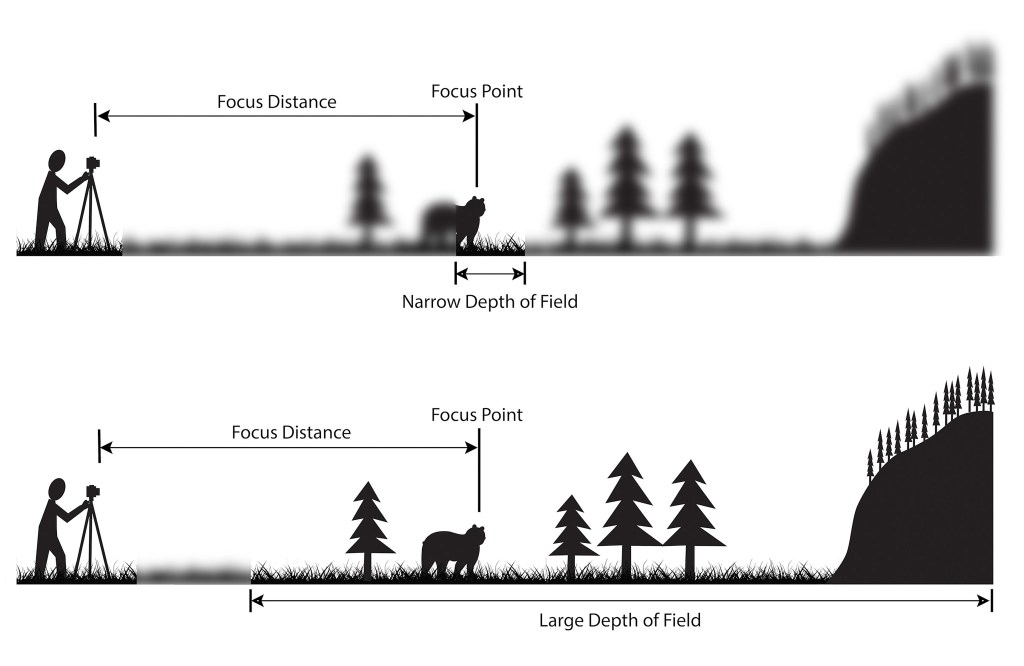
Depth of field is the amount of focus in an image.
In Narrow Depth of Field, we only see the Wolf in focus. Whereas in Large Depth of field, we see everything.
Depth of field is controlled by Aperture. In the AV mode of the camera. The Aperture is the size of the opening in the lens that lets light into the camera.
Note that the smaller the aperture number, f/1.4, the larger the opening, the larger the opening the smaller the opening. It works backwards.
So if you want the background blurred out, use an aperture of f/1.4 For everything in focus, you want to use a higher aperture, f/11, or f/22. Note that aperture effects shutter speed, and with a aperture setting of f/22, the shutter speed will be several seconds, so you need a tripod when shooting in this mode.
USE A/V mode to control aperture. Most portraits focus on the person, but a middle setting would allow the background to be visible as well.
What I’m grading you on:
Clear, in focus images.
A background that informs us of your person’s personality.
Appropriate Depth of field to the subject.
Strong sense of who this person is.
One indoor portrait and one outdoor portrait are due on Monday, 10/7
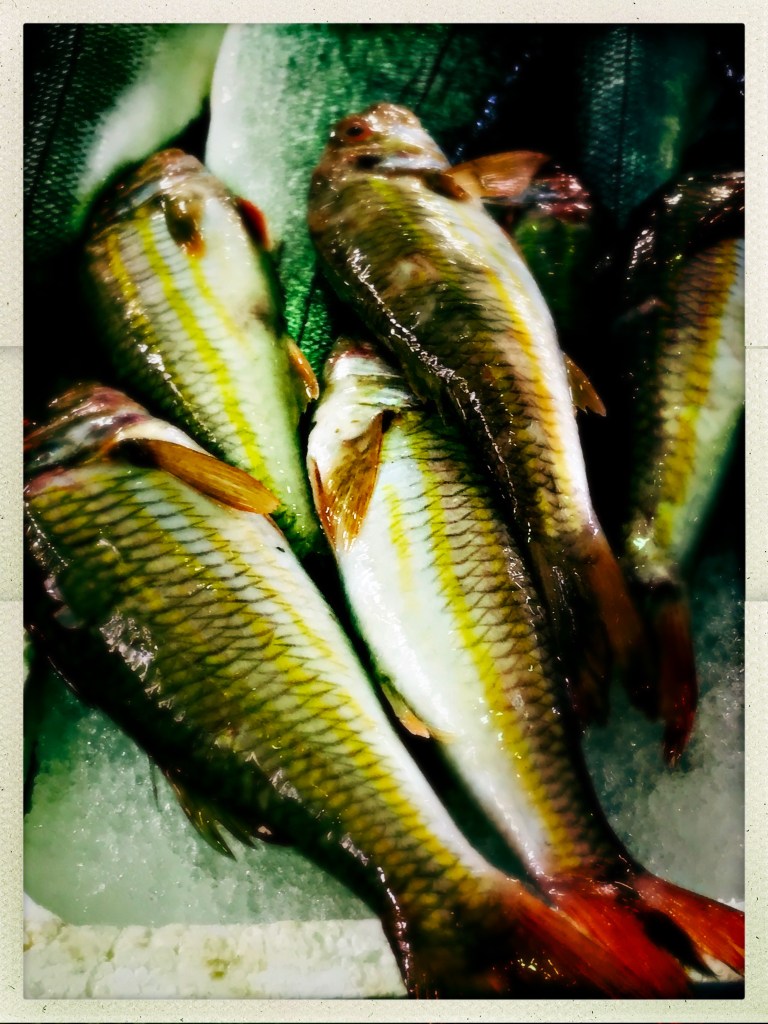
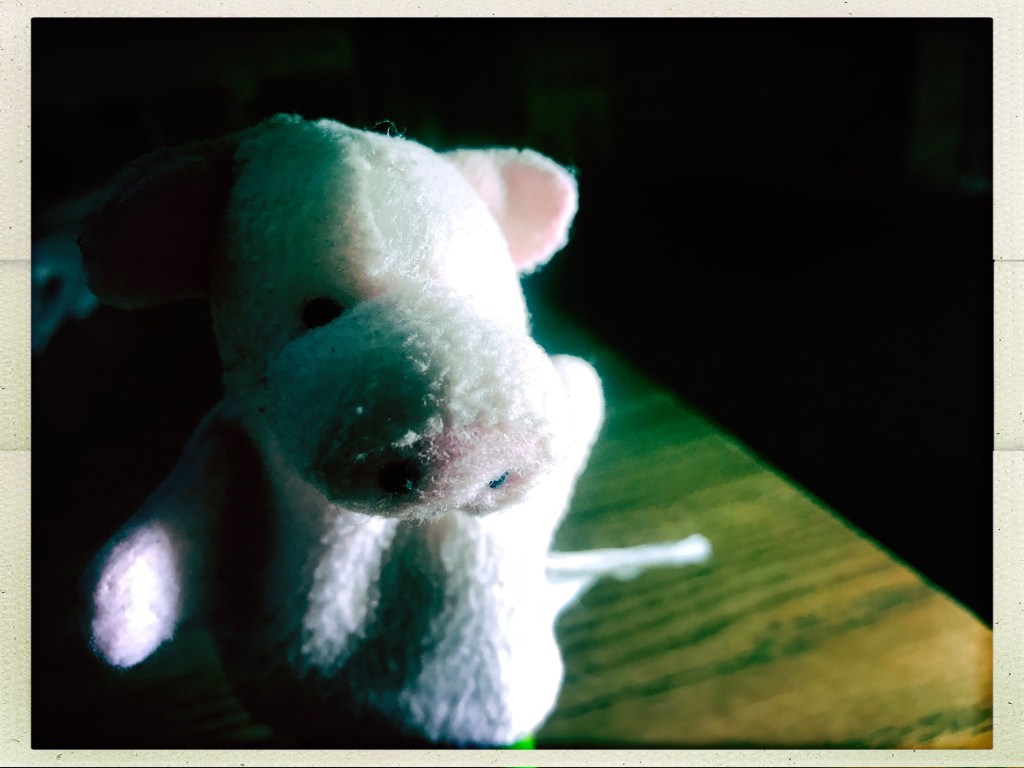
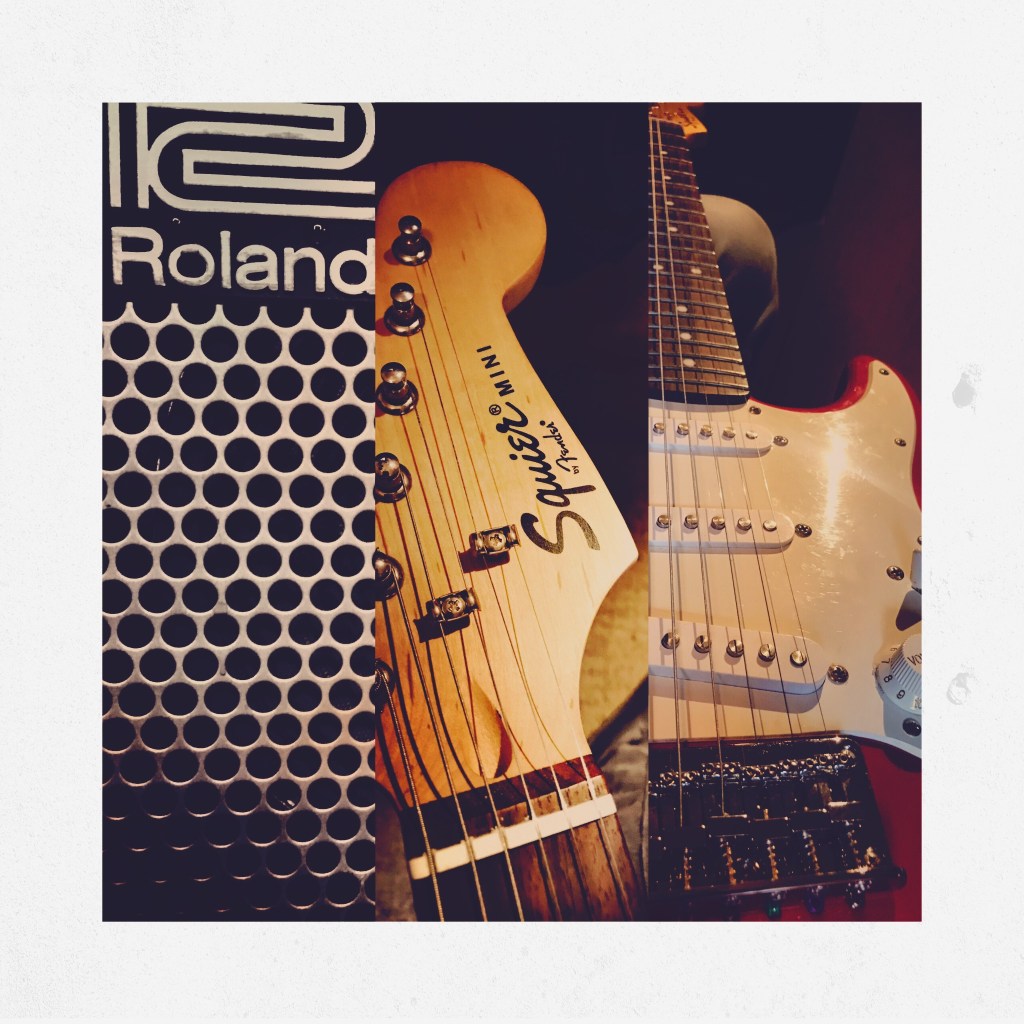
For this weekend you will bring in three photos of a subject sacred to you. Light the photograph in a way that shows just how important this subject is to you. Let the editing and lighting show how you feel about this subbject.
Examples:
Classic Cars
Fresh Seafood
Christopher Pig
Playing Guitar
Being Outside/Nautre
Take several images of the same subject. Adjusting camera angles, focus, etc.
We will rate the photos on Monday.
Final Photos will be turned in on Tuesday, 10/1
What I’ll be Grading You On:
Clear/In Focus Image
Using the angle and the light that shows how you feel about the subject.
How well you were able to select your final image.
Note how the image shows a person frozen in motion and the image is symmetrical
For this week’s photo challenge, we will be using a fast shutter speed in order to freeze a fast moving object or person. We will then take the final image into photoshop and duplicate the image, laying one next to the other, see above for an example
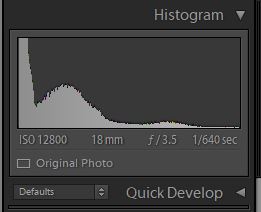
To do this, we will need to shoot with a fast shutter speed. Looking at the histogram in Lightroom we see how the student used a fast shutter speed in order to capture this image.
Note the shutter speed here, 1/640th of a second
For this photo, the photographer used a shutter speed of 1/640. Using a slower shutter speed would have resulted in an image that has motion blur. Which is when a part of the subject is blurred out because the shutter speed was not fast enough to capture the person or object.
How you will do it.
Take a practice photo, where you demonstrate freezing a fast moving object or person.
Post it to your visual journal. Write a reflection about what you could do to improve this photograph? About which photo would look good placed side by side by the same photograph? What subject would look good with a duplicate facing the opposite direction?
Take the photo.
Edit it in Lightroom or Photoshop.
Brightness Contrast
Details/Sharpen
Details/Noise Reduction
Clarity
Color or Black and White?
Cropped?
Straightened?
Make a virtual copy in Lightroom. Rotate one image so it is facing the opposite direction.
Open up both images in Lightroom.
Crop the image and expand the work area.
slide one photo next to the other.
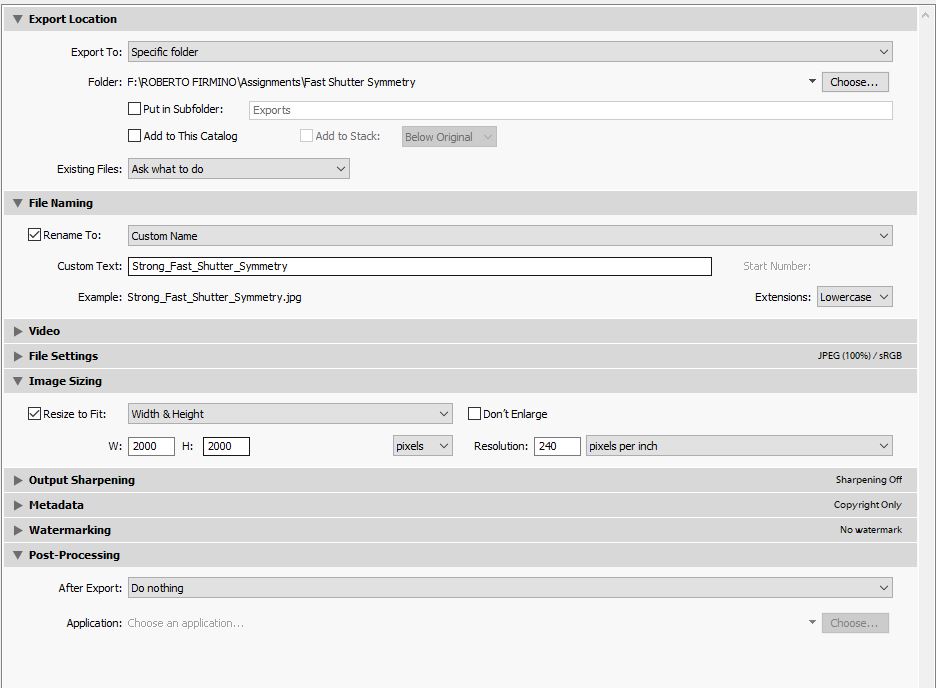
Export the photo from Lighroom using these settings
TWO Photos are due on 10/2
One practice photo demonstrating you can freeze motion with fast shutter speed.
One final photo that demonstrates slow shutter speed AND has a symmetrical mirror image like the one in the above example.
What I’m grading you on:
Image is in focus.
Image is well edited, see above for checklist.
Image has a symmetrical image next to it. See example.
Subject is a fast moving object or person frozen with a fast shutter speed.
Upload the photo to your Adobe Spark Visual Journal.
Write a reflection in your visual journal about what sort of a story you could tell with this effect. What would you need to add to make a compelling story out of this photograph? What would this image look like?
Make several pictures from different camera angles and different shutter speeds.
Use the same selection process you used to make your final Decisive Moment image.
Tuesday
Put the finishing touches on the image and turn it in as a .jpg to Google classroom.